Edging a shield: page 3
I knew that I would run out of time, so I soaked my rawhide edge mid-way through attaching the metal edge. I try to give my rawhide a full day of soaking. I find that this lets the hide expand to its maximum length and makes it more stretchy. The piece I soaked this time had already been in use on my shield so I was confident that it would fit. In fact, it would be a little too long, since I had trimmed the shield a bit.
Once I had the edge fully soaked, I wiped off the excess water, looped it around the shield and marked where the overlap would start. I then set the shield aside, and made a mark about three inches short of the first one. I then stitched the hide into a loop using synthetic sinew. This would make the loop shorter in circumference than my shield, but it had some streatch in it, which let me pry it onto the shield with some effort. I wanted a really tight fit.
As a general rule, you should cut your DRY rawhide to the length of the circumference of your shield, plus a couple of inches for good measure. The total width should be twice the final visible width on the face of the shield, plus a quarter inch for odd shrink and the thickness of the shield. I.E. if your shield will have a 3 inch border of rawhide on the front, make a 6 1/4 inch wide strip of rawhide.
When rawhide dries, it shrinks. As it does this, the sides of the hide wrap around the edge of the shield and lay flat on the shields face. If it does not shrink enough, the sides float out, as the rawhide has become a V channel.
TO ensure that your rawhide shrinks all the way, you need to do some math, and fudge. First, measure the circumference of your shield minus the width of your rawhide. A 22 inch round shield with a 3 inch band would have a 16" diameter inside the 3 inch band. multiply 16 by pi, and you have the final length of the rawhide. Add at least 3 inches for overlap and stitching.
The fudging starts when the rawhide has been soaked. It expands and changes length. It mostly gets longer, but I can't guarantee that on your piece of rawhide. Figure out how much it's changed and adjust the amount of overlap appropriately before sewing it into a loop.
The shrink to fit method works well on my flat shields, but my kite is curved. In order to get the hide to sit snug on the concaved backside of my shield, I clamped the it to the shield with about 30 large binder clips before drying. Once the rawhide is dry, it will keep the concaved shape.
To speed the drying (I was running out of time) I used a heat gun. I found that instead of taking days, it took about an hour to get the edge firmed up enough for the next step. That took a lot of electricity. In a perfect world, I would have let the shield dry for two days, then hit the edge in spots with the heat gun.
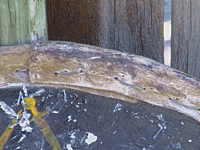
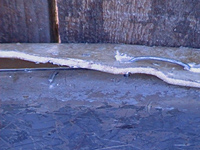
because my shield gets exposed to all sorts of moisture the concave back side of my rawhide will not stay flat without some help. I drilled holes at approximately every inch around the edge of my shield; in far enough from the edge to miss the stainless steel edge, but out enough to ensure that the rawhide would not tear out. I then wove the rawhide to the shield with imitation sinew.
The sinew used held up for a while before dieing. I then switched to some thicker cording, which also started dieing after a while. Finally, after racking my brain, I remembered that my Knight uses wire to tie his rubber edge to his shield. I found that the wire loops would smash into the rubber and the edge of a shield, killing the rubber. Since I don't like high maintenance equipment, I stopped using wire years ago.
On this shield however, I was not making loops over the edge of a shield I was zig-zagging between the front and the back of the shield. Any strike on the wire would be on the face of my shield rather than on the edge. Because strikes to the edge of my shield would not touch the wire, and strikes to the face get absorbed as the shield wobbles, I believe that the wiring could last a very long time.
Once I started threading the wire through the holes, it quickly became apparent to me that wire is like really heavy, hard to bend twine. It will somehow twist itself into little loops and try to kink as you draw it through a hole. Worse yet, unlike twine, once you put a kink or bend in wire, it becomes very hard to smooth out.
It's important to get the slack out of the wire. To do this you need a metal rod with a rounded cross section and a taper. You need to insert the rod between the wire and the shield (hence the taper) and use it as a lever to pull the excess wire from the previous loop.
I used a pair of needle-nosed pliers. If you don't remove the slack, you'll have little loops of wire that float out and just beg to get fatigued. Even with the slack pulled out, the wire still floats out a bit. If your lever has corners of any sort, you will kink and compress the wire, which will weaken it.
Finally, I found that instead of trying to tie the end of the wire into a knot (not a likely event) all I had to do was bend the end back and tuck it between the metal and the rawhide after going through one layer of rawhide and metal.
I've been to a couple of very intense fighter practices since I wired my shield edge and I haven't seen any damage to the wire. In the event that I DO get a break in the wire, I should be able to patch it fairly painlessly. I'll just pull the wire back through a couple of holes, and bend it back under the edge.


